Teach Yourself Special Effects
This page will become entirely more detailed once I get back to Austin, TX (I'm in Chicago on a contract with Motorola right now). I will include animated gifs showing how to do each process and might even include downloadable videos of each step. For now, I'm just going to include a very basic rundown on how simple effects are made. I don't have very good images either, but have included what I have for now.
There are two types of latex effects (latex being the most common type of material associated with special effects): slipcasting and foam latex. In my opinion, slipcasting is for wussies. Not that slipcasting doesn't serve its purpose though! Slipcasting is the material that your typical Halloween mask is made from. Not very flexible and very hot to wear. Slipcasting can be used for some small effects very cheaply and quickly, but foam latex is where all the fun is! Foam latex is the type of material that is used to transform actors into other creatures. It conforms to the actors' faces and allows them to really become the characters you are designing for them.
The first step in transforming someone into "a monster" (monster being a general term meaning any other creature), is to get a positive of their face.
By getting a positive of their face, you can mold material on the positive and create the monster you need for the effect. A positive is just a term meaning an exact replica of the actor's face. This replica is made out of a hard material such as plaster and can withstand 500+ degrees in the oven.
 To get a positive, follow these steps (note, these are the author's recommendations. there are other methods possible):
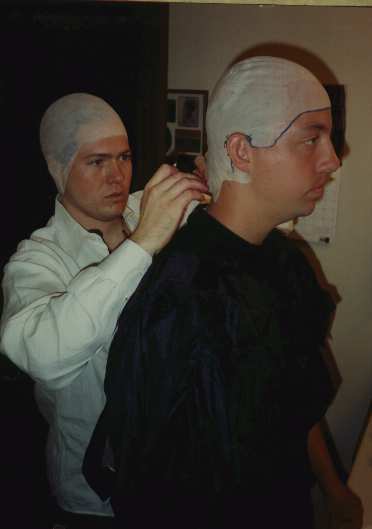
- Place a woochie bald cap on the person in question, gluing all surfaces to their face with spirit gum. A woochie bald cap and spirit gum can be obtained from Burman Industries. Actually, any bald cap will do, but I've found that the woochie is the best for everything (altough a tad more expensive).
- Vasaline all hair surfaces, including eyebrows, eyelashes, exposed facial hair, etc.
- Make sure you warn the person that they are about to be completely covered with a gooey substance that will prevent them from seeing, hearing or moving their mouth (not a fun environment for many people).
- Mix a batch of alginate (see supplies page) and pour a good layer over the portion of the face you want to get a positive of (make sure to not cover the participant's nostrils at all, otherwise things could get ugly (and deadly).
- As the alginate begins to harden, cover the alginate with a single or double layer of plaster bandages (the type used on broken bones). This layer will provide support to the alignate once you remove it.
- Follow the alginate's directions for hardening time. Once the timer has gone off, ask the participant to move his/her face around inside the alginate. Tell them to make a bunch of facial expressions slowly. This will remove the alginate from their face and will make the removal of the mold easier.
- Have the person lean forward and aim their face toward the ground. Gravity should eventually pull the mold off, but you can assist and make sure that the alginate retains it shape in the plaster shell.
- Give the participant a hand. Not a fun experience.
- Soon after the mold has been removed, put a small layer of liquid plaster into the negative and paint it into every small nook and cranny. Keep building up the layers of plaster until the negative is getting filled. Leave a small area in the middle where you can place a handle of some sort (used to pull the positive from the negative later down the road).
- Finish filling up the negative until the top is filled with plaster. Let it set (it will get very hot so just leave it alone for a bit).
- When the plaster has cooled off a bit, removed the alginate and you should be left with an exact replica of the person's face! Pretty cool, huh? If that person is famous, you may want to make tons of duplicates of this master so you don't ever have to put them through this again (and so you can sell off a few for a few thousand!).
- Next is the fun part. Get a bunch of soft Roma Plastina (sp) clay from your local hobby store or Burman Industries, and start sculpting the monster you want the actor to turn into. This takes A LOT of talent and/or patience and will need to be perfect before continuing as there will be no turning back. Details on the surface will appear on the final product, so make all the small veins and textures that you want.
- When you are done sculpting (make sure you are REALLY done), cover the clay with a small amount of vasaline everywhere. Don't put too much, and make sure all exposed plaster areas are covered well. This step will allow for an easier separation of molds later.
- You may want to make a few keys on your mold at this point. These are little notches that will eventually be filled with plaster and will allow you to later line up your positives and negatives better. Plus, a few escape holes will help later as well. These are holes in the positive where latex can escape from when you put the molds together with the latex in between. One on the upper lip and one in the forehead are good spots.
- Next, make a good area to lay your postive face up on. Make a wall all the way around your mold. This will capture all the plaster when you are pouring on the negative.
- Paint on the plaster like you did with the alginate before. Making the plaster more liquidy here will allow for the plaster to pick up all the small details you have put into your design.
- Gradually build up the plaster until you have a nice big negative that is about 1 inch thick everywhere. If you see plaster heading toward areas that you did not put vasaline on (especially around the edges), then put the vasaline on first!
- Let the plaster harden and cool. Then pull out the positive from the negative (this can be the most difficult part of the entire process, and will often crack or break many molds). If all is well, then you should have a positive of the actor's face and a negative of what you want them to look like. Next we are going to put foam latex in there so when you are done, the latex will fit perfectly to the actor's face, but will look exactly like the creature you molded! Make sure you completely clean both the positive and negative at this point. Make sure there is not extra clay and vasaline anywhere.
- Mix the curing agent, foaming agent, and gelling agent as outlined in the foam latex kit you ordered (Burman has a nice kit that contains GREAT instructions). One of the most important things you need to remember is to write down each baking attempt that you try. Write down the date, measurements of each agent, temperature of oven, room temperature, and time of each process (mixing and oven are equally important here). The chances of you getting everything right immediately are slim, so you want to have control over the next attempt.
- Pour the final mixed product into the negative and make sure it gets into all the small creveces. This is a very important step time wise. If you do this process too long, then the agent will gel up and the attempt will be ruined. But if you don't get the latex in good enough, then the mask will bake right, but will have holes and stuff everywhere.
- Pour all the latex and and put any extra on the cookie sheet (or whatever you have it one). This will be used to test the attempt before removing it from the oven. Right before you put the positive into the latex, pound the negative on the floor gently to remove any air bubbles inside.
- Take the postive and line it up with the negative as best you can (this is where the keys will be beneficial. Push the positive into the negative, putting your entire weight on it if necessary. Make sure the molds lined up perfectly!
- Next, put the two molds in the oven for the specified period of time and at the right temperature (you may have to let them sit outside the oven a bit too (read the instructions of the agent).
- If you want to check on the attempt, open the oven and test the extra latex that you put on the sheet or that overflowed in the escape holes. If the material "springs" back rapidly, then the process should be done.
- When you are confident that the process has worked, remove the molds from the oven. Warning!!! Everything is VERY VERY VERY hot at this point. Especially any clay on the molds you missed and the air that will come forth from the molds.
- Put on gloves and be cautious. Hold onto the handle you built into the positive and gently, but strongly pull the positive from the negative. An assistant would be helpful to carefully remove the lately as you pull the positive from the negative.
- Once you have removed the latex piece from the molds (don't put it on yet as it is hot hot hot), put both molds back together and place them in the oven so they can cool down slowly (turn off the oven at this time).
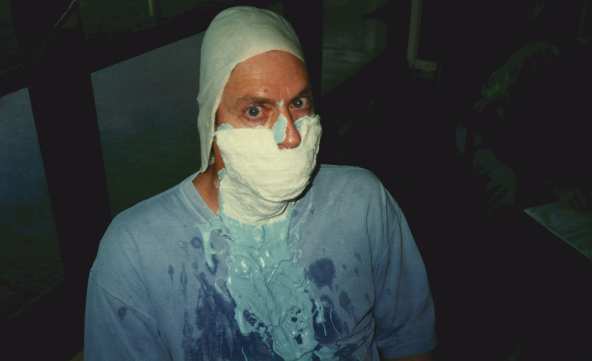
- THAT'S IT!!! Paint your mask as necessary and apply to your actor with spirit gum.